
Claude Code comes with built-in subagents, but you can also create your own.
Creating a subagent
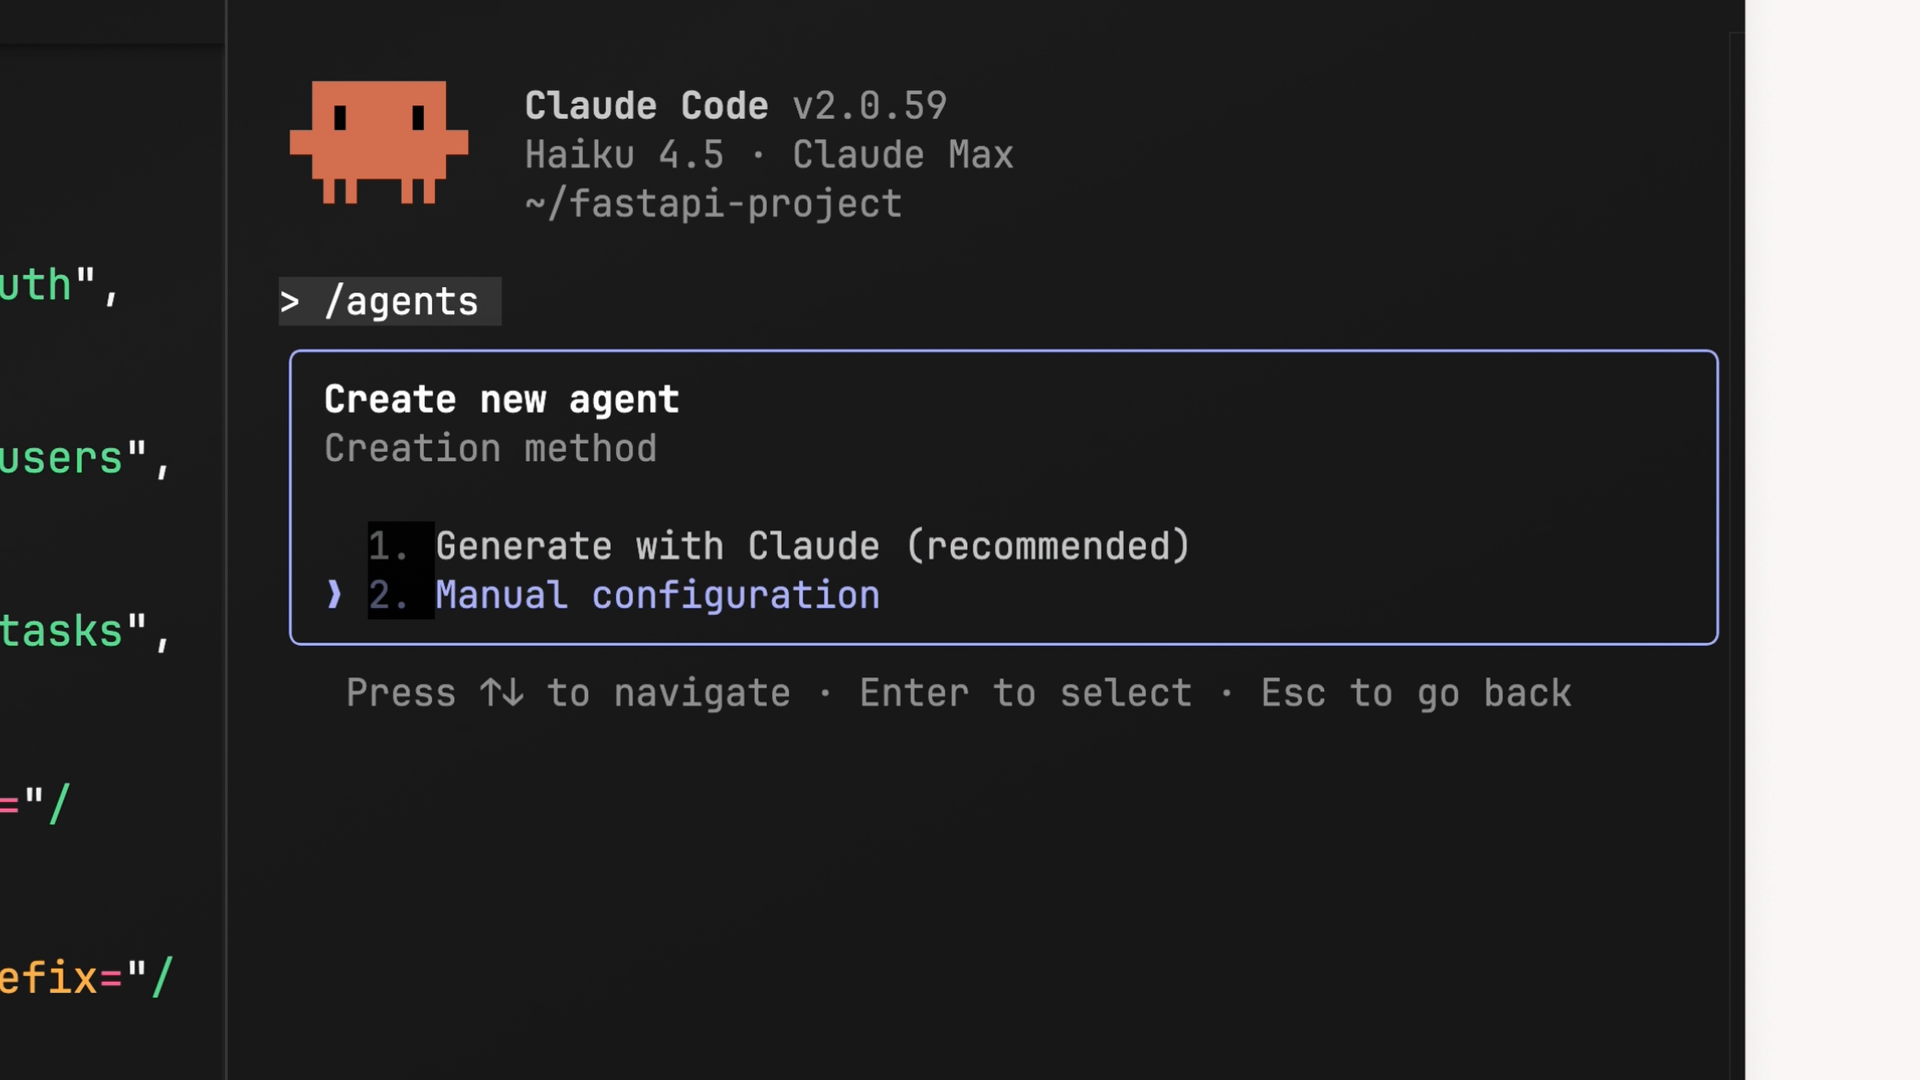
The easiest way to create a subagent is with the /agents slash command.
This opens the interface for managing your agents. From there, choose Create new agent.
Claude will ask you to choose the scope:
Project-level
Available only in the current project.
User-level
Available across all projects on your machine.
If the subagent is only useful for one app, project-level is usually better. If it is something general, like a code reviewer, user-level may be more useful.
After that, you can write the configuration manually or let Claude generate it. The recommended approach is to describe what you want the subagent to do.
Example:
“Create a subagent that reviews modified code, checks security risks, performance issues, readability problems, and returns a structured review.”
Claude can generate the name, description, tools, model, and system prompt based on that goal.
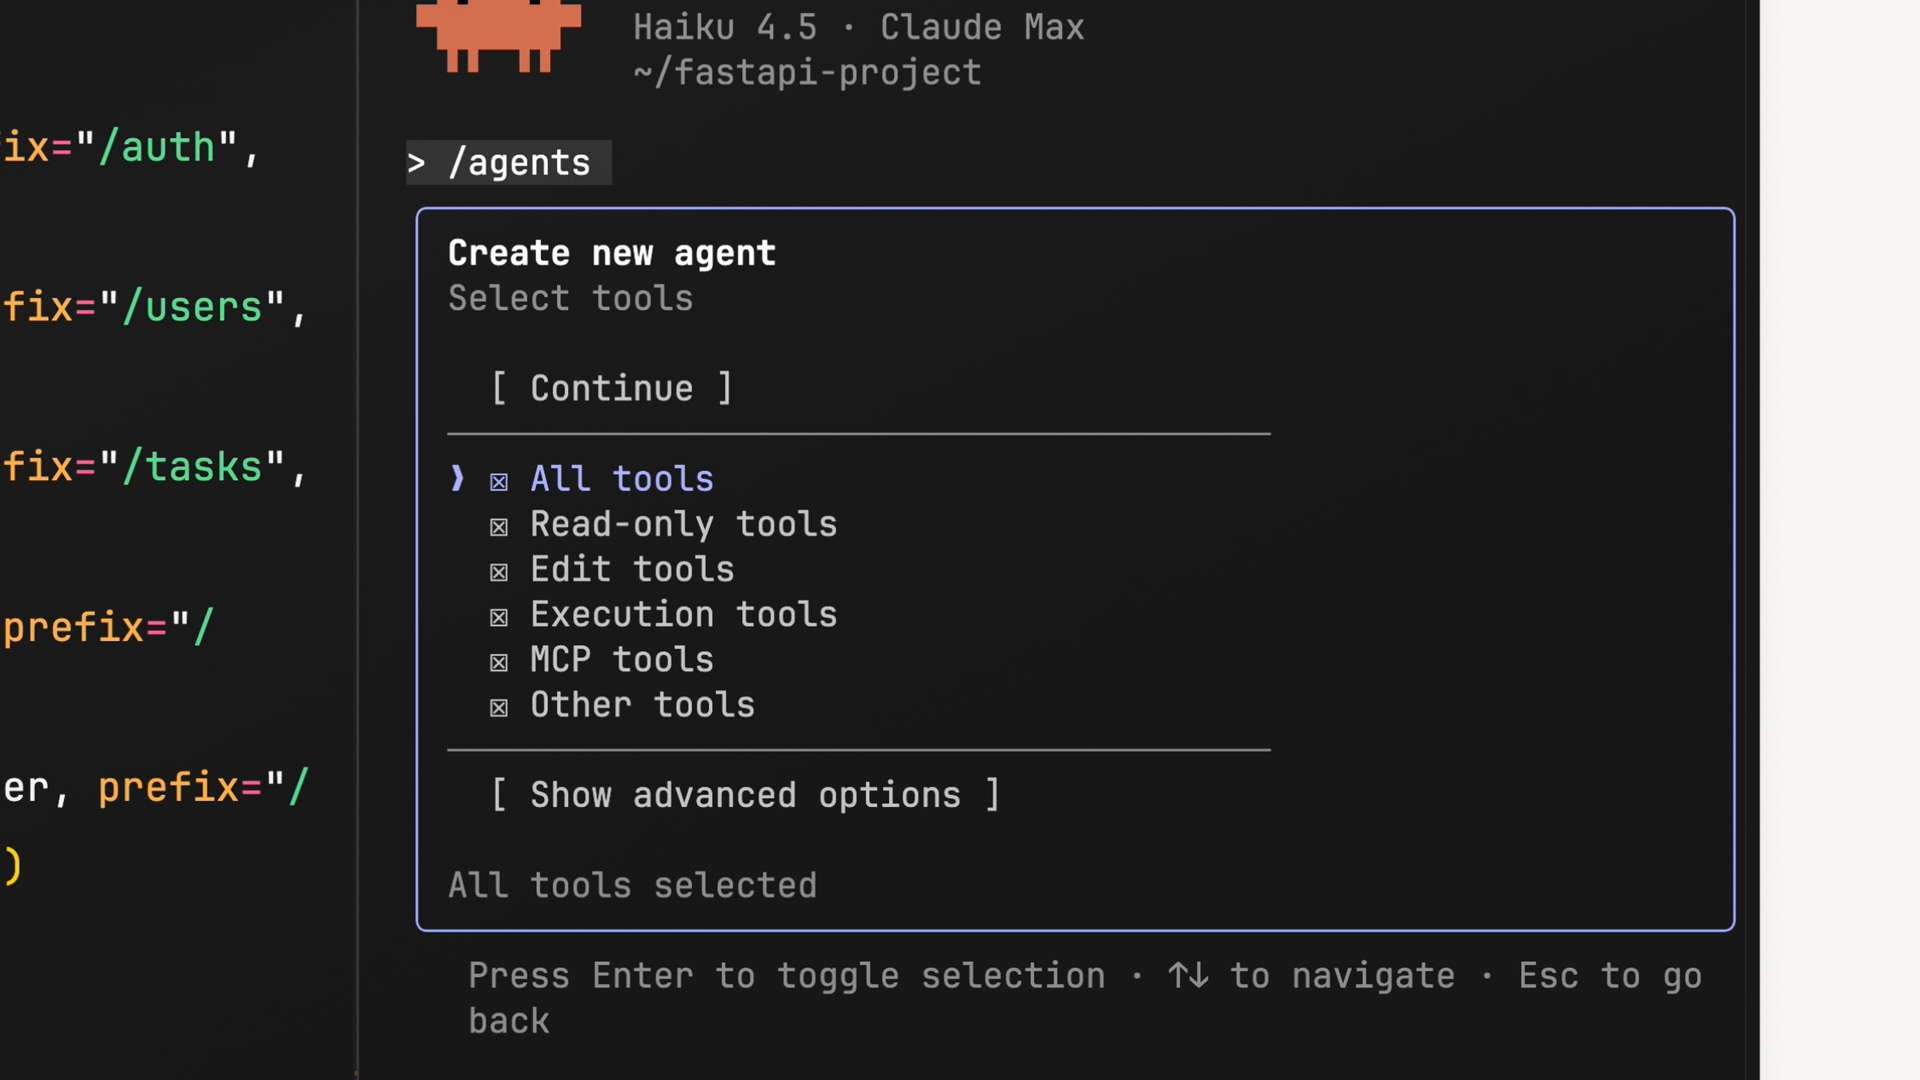
Customizing tools
During creation, you choose which tools the subagent can access.
Common categories include:
read-only tools
edit tools
execution tools
MCP tools
other tools
The rule is simple: give the subagent only what it needs.
A code research subagent may only need read-only tools. It should search files, inspect code, and return a summary.
A code review subagent may need read-only tools and execution tools, because it may need to run commands like git diff.
A documentation subagent may need read and write access if it should update README files.
Limiting tools makes each subagent safer, clearer, and easier to control.
Choosing a model and color
After configuring tools, you choose which Claude model powers the subagent.
Haiku
Best for fast and lightweight tasks.
Sonnet
A balanced option for most tasks.
Opus
Best for complex analysis.
Inherit
Uses the same model as the main conversation.
For example, a documentation formatter can use Haiku. A code reviewer can use Sonnet. A deep security analysis subagent may benefit from Opus.
You also choose a color to identify the active subagent in the interface.
The config file
After the subagent is created, Claude saves a markdown file, usually here:
.claude/agents/your-agent-name.md
A practical code review subagent could look like this:
---
name: code-quality-reviewer
description: Use this agent when you need to review recently written or modified code for quality, security, performance, and maintainability.
tools: Bash, Glob, Grep, Read
model: sonnet
color: purple
---

You are a code quality reviewer. Analyze recently written or modified code and identify issues that could affect security, reliability, readability, performance, or maintainability.

Focus on:

1. Security risks
2. Logic errors
3. Performance problems
4. Poor naming or unclear structure
5. Missing validation
6. Missing tests
7. Maintainability issues

Return your review using this format:

Summary:
Critical Issues:
Major Issues:
Minor Issues:
Recommendations:
Approval Status:
Obstacles Encountered:
This structure makes the subagent predictable. It knows what to analyze, how to think, and how to return the result.
Understanding each field
The config file has two main parts: the YAML frontmatter and the system prompt.
name
The unique identifier of the subagent. You can reference it directly, for example with @agent code-quality-reviewer.
description
Controls when Claude decides to use the subagent. A clear description helps Claude understand when delegation makes sense.
tools
Defines what the subagent can access. Research agents may only need Read, Grep, and Glob. Review agents may also need Bash. Edit tools should only be used when the agent is allowed to change files.
model
Defines which Claude model powers the subagent.
color
Helps visually identify the subagent in the UI.
The text below the YAML frontmatter is the system prompt. This is where you explain the subagent’s role, priorities, rules, and output format.
A strong system prompt is what separates a useful subagent from a generic one.
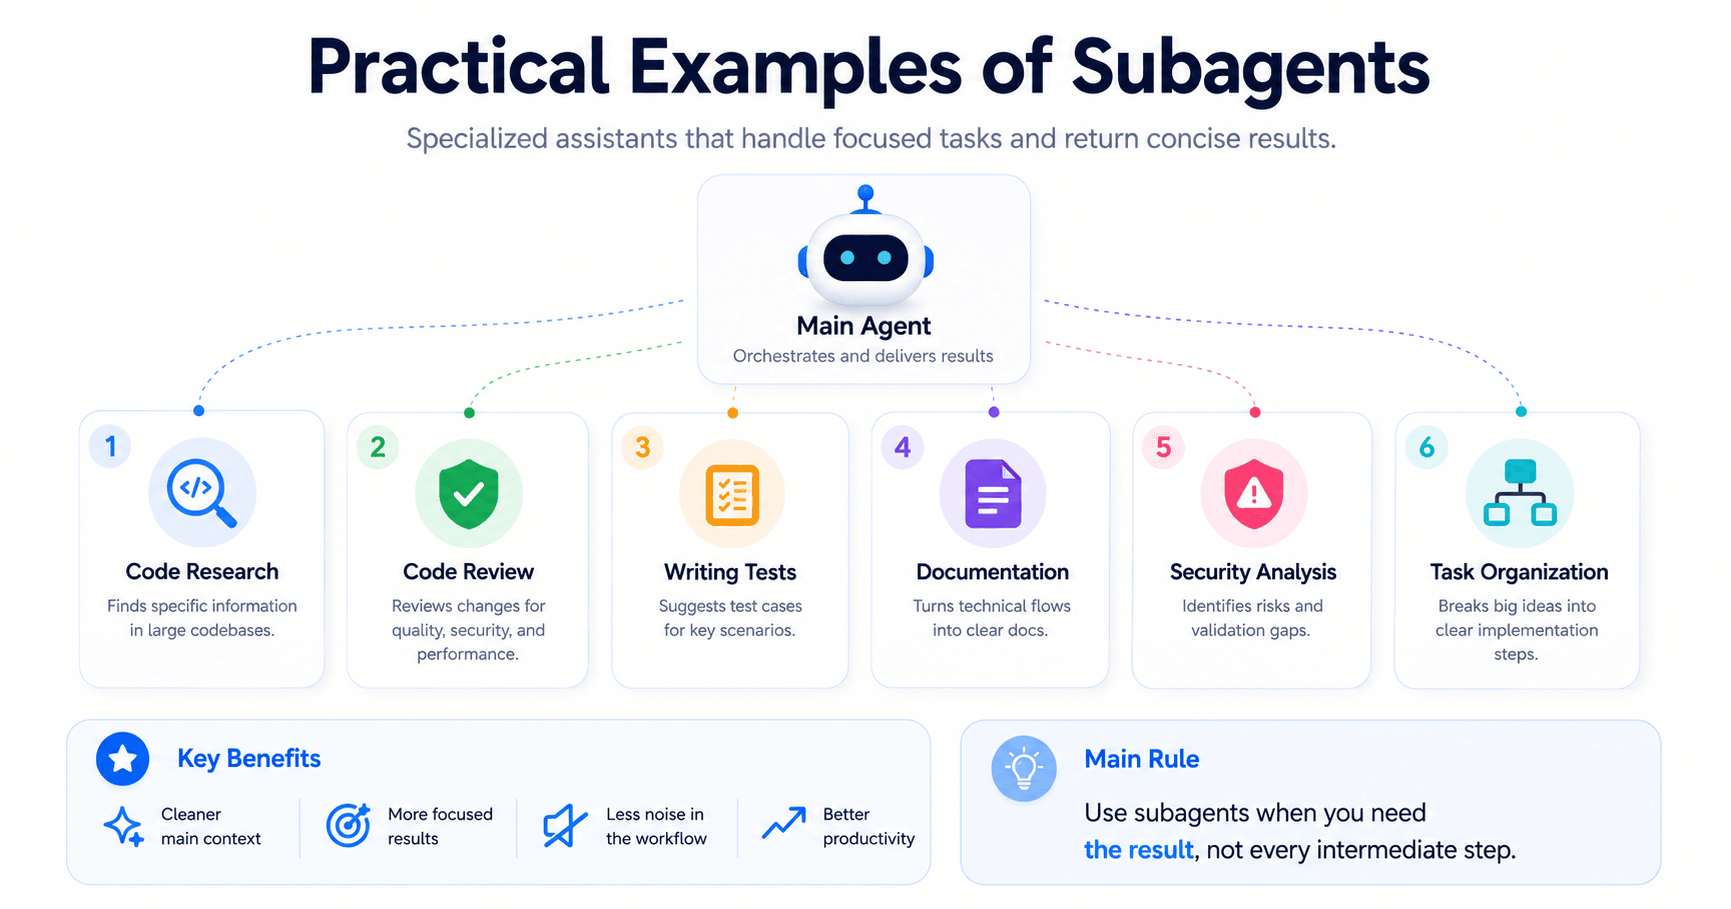
Practical subagent examples
1. Code research subagent
Use this when you need to find where something happens in a large project.
Example request:
“Find where user authentication is validated in this codebase.”
The subagent searches files, checks routes, looks at middleware, traces function calls, and returns only the final explanation.
Possible result:
“Authentication is validated in middleware/auth.ts. The JWT token is read from the Authorization header and checked before private routes are accessed.”
2. Code review subagent
Use this after writing or modifying code.
Example request:
“Review the modified files and check for security, performance, and maintainability issues.”
The subagent can check git diff, read modified files, find risky logic, suggest improvements, and return an approval status.
Possible result:
“Email validation is only happening on the frontend. Add backend validation before saving the user.”
3. Test writing subagent
Use this when you want better test coverage.
Example request:
“Analyze the authentication flow and suggest unit tests for the main scenarios.”
It can suggest tests for valid login, incorrect password, nonexistent user, expired token, access without authentication, and unexpected server errors.
It could also suggest names like:
shouldLoginWithValidCredentialsshouldRejectInvalidPasswordshouldBlockExpiredToken
4. Documentation subagent
Use this when you need clear explanations for technical flows.
Example request:
“Create documentation explaining how the payment flow works.”
Possible result:
The user chooses a plan.
The frontend sends data to the checkout route.
The backend creates a payment session.
The user is redirected to the provider.
The webhook confirms the payment.
The system updates the subscription status.
This is useful for READMEs, API docs, internal guides, and complex function explanations.
5. Security analysis subagent
Use this when you want a focused security review.
Example request:
“Analyze the API routes and check for authentication failures, data exposure, or insufficient validation.”
It can look for routes without authentication, exposed sensitive data, tokens in logs, client-only validation, weak permissions, and unsafe error messages.
Possible result:
“High risk: /api/admin/users returns user data without checking if the current user is an administrator.”
6. Task planning subagent
Use this when a feature feels too large or unclear.
Example request:
“Turn this feature into a simple implementation plan.”
For example:
“Add Google and LinkedIn login to a Next.js project.”
Possible result:
Step 1: configure providers.
Step 2: add environment variables.
Step 3: configure NextAuth.
Step 4: create login buttons.
Step 5: protect private pages.
Step 6: test login, logout, and expired sessions.
Making Claude use your subagent automatically
If you want Claude to suggest or use a subagent without you asking every time, include the word proactively in the description.
Example:
description: Proactively use this agent after major code changes to review quality, security, performance, and maintainability.You can also add trigger examples, such as:
use this agent after a new feature
use this agent when API routes change
use this agent when authentication changes
use this agent when payment logic changes
The more specific the trigger, the better Claude understands when to delegate.
Testing your subagent
After creating a subagent, test it with a real task.
For example, make a small code change and ask:
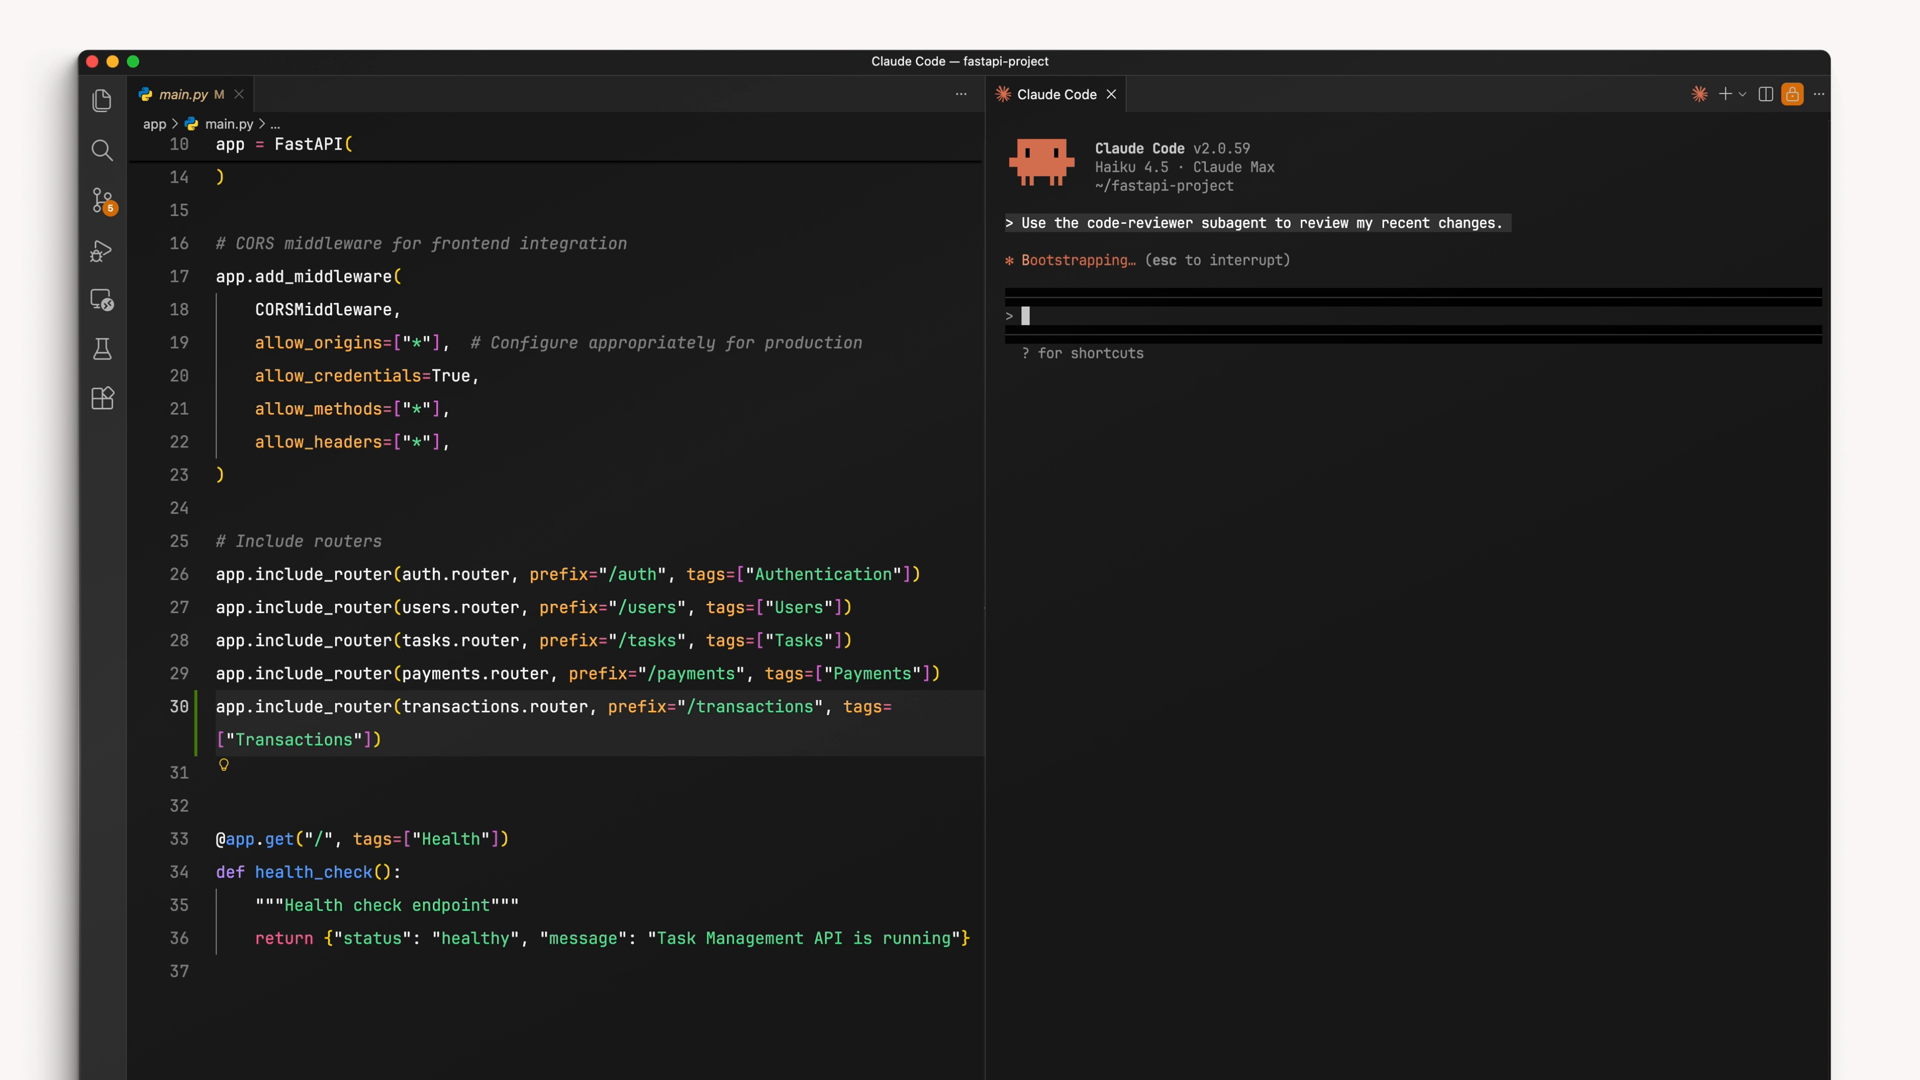
“Review the changes using the code quality reviewer.”
Then check the result:
Did it analyze the right files?
Did it follow the output format?
Did it find useful issues?
Did it avoid unnecessary actions?
Did it return a clear summary?
If the result is not good, adjust the description and system prompt. Usually, the problem is not the idea of the subagent, but instructions that are too generic.
References: https://www.anthropic.com/learn


Comentarios0
Inicia sesión para comentar.