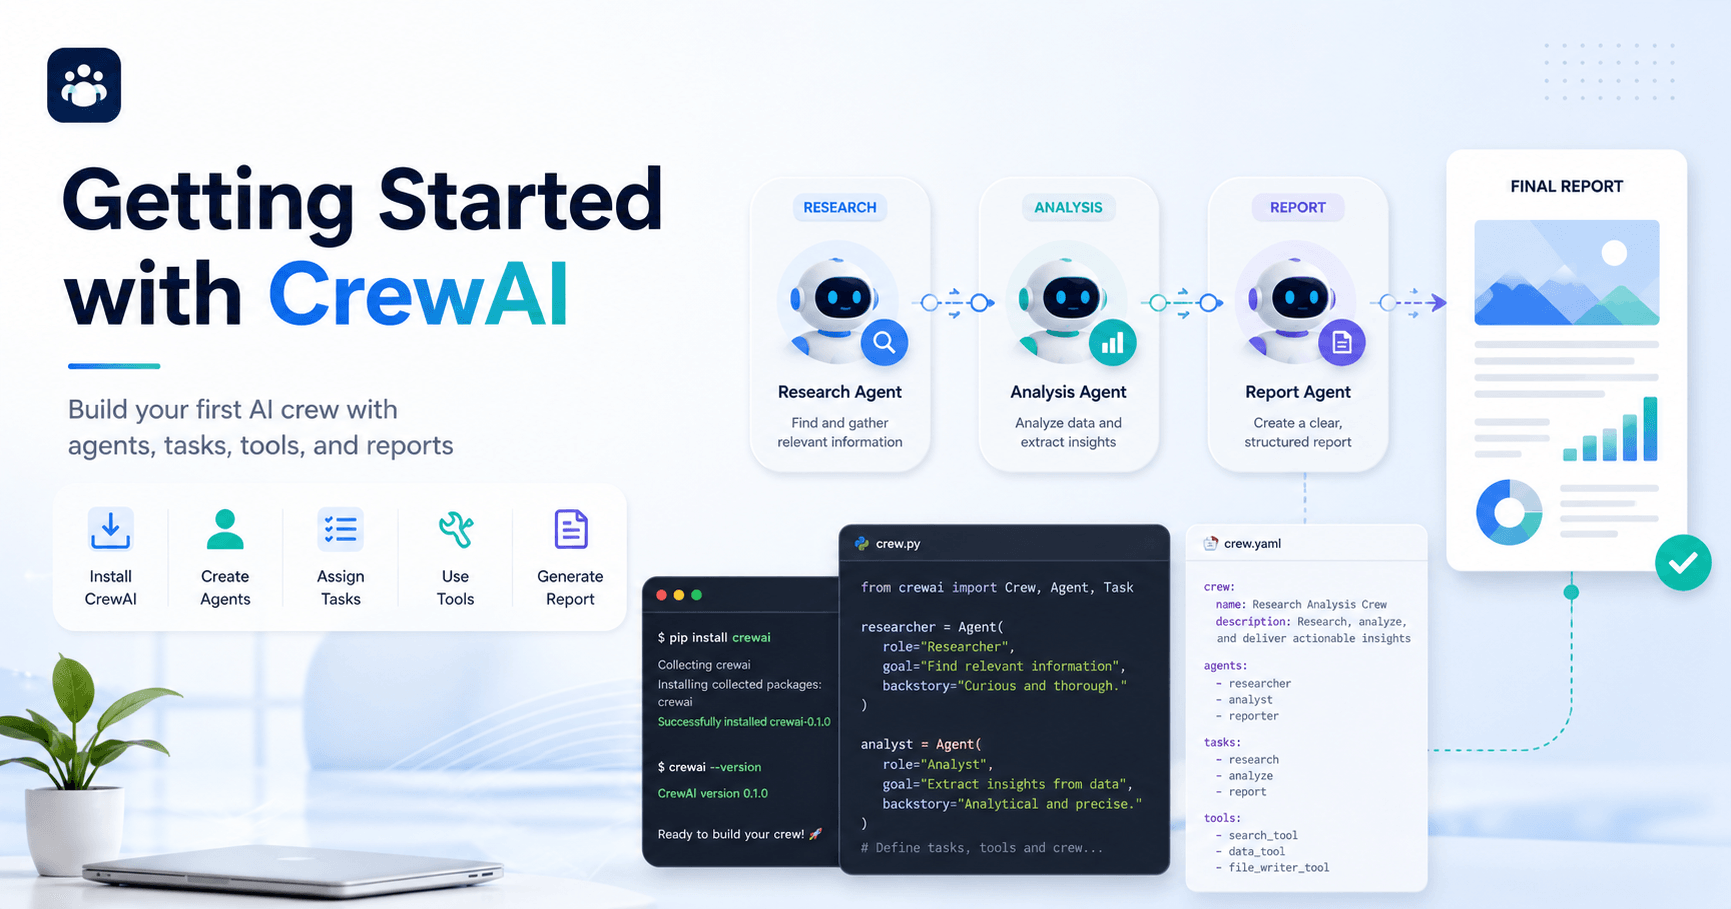

CrewAI is an open-source framework designed to help developers build teams of AI agents that can work together on specific tasks. Instead of using a single AI assistant to answer one prompt, CrewAI lets you create multiple agents, give each one a role, assign tasks, connect tools, and run a complete workflow from start to finish.
In this tutorial, the main goal is simple: install CrewAI, create a basic project structure, configure agents and tasks, and run a working AI crew that produces a final report.
What You Need Before Starting
Before installing CrewAI, the first requirement is Python. CrewAI works with Python versions greater than 3.10 and lower than 3.13. To check your installed version, you can run:
python3 --version
If Python is installed correctly, the terminal will show your current version. If not, you can download it from the official Python website.
The next requirement is UV, a fast package and dependency management tool. CrewAI uses UV to handle installations and dependencies efficiently. After installing UV, you can confirm that it is working by running:
uv version
If the command returns a version number, UV is ready. If it returns an error, the installation may need to be fixed before moving forward.
Installing CrewAI
Once Python and UV are ready, the next step is installing the CrewAI command-line tool. The installation command is:
uv tool install crewai
After the installation, you may see a warning asking you to update your shell path. If that happens, run:
uv tool update-shell
This usually only needs to be done once. To confirm that CrewAI was installed correctly, run:
uv tool list
This will show the tools installed through UV, including CrewAI and its current version.
If you already had CrewAI installed and want to upgrade to the latest version, you can use:
uv tool install crewai --upgrade
Creating Your First CrewAI Project
CrewAI makes it easy to create a new project using a built-in scaffolding command. The recommended method is to use the YAML-based project template, because it automatically creates the main files and folders you need.
To create a new crew, run:
crewai create crew your_project_name
In the tutorial, the example project is based on a crew that researches a topic online and then creates a report. During the setup, CrewAI asks you to choose an LLM provider. In the video, OpenAI is selected, and the model used is GPT-4o Mini.
After the project is created, move into the project folder with:
cd your_project_name
Inside the folder, CrewAI generates a clean structure with configuration files, source code, agent definitions, task definitions, tools, and environment files.
Understanding the Project Structure
A new CrewAI project includes several important files and folders.
The knowledge folder is where you can add external knowledge, such as PDFs or other files that your agents may use later.
Inside the src folder, you will find the core project files. The config folder contains YAML files for agents and tasks. These files are important because they define what each agent does and how each task should be completed.
The agents.yaml file defines the agents. In the tutorial, there are two main agents: a researcher and a reporting analyst. The researcher is responsible for searching for information, while the reporting analyst turns that information into a structured final report.
The tasks.yaml file defines what each agent should do. A task includes a description, an expected output, and the agent responsible for completing it.
The crew.py file connects the agents, tasks, and tools together. This is where the workflow is orchestrated.
The main.py file is the entry point of the project. It is where you define the input topic and start the crew.
There is also an .env file, which stores API keys and model configuration. This file is very important and should never be committed to GitHub. To protect your keys, make sure .env is included in your .gitignore file.
Configuring API Keys
To run the project properly, you need to add your API keys to the .env file. Since the tutorial uses OpenAI, an OpenAI API key is required.
The project also uses SerperDevTool, which allows the research agent to search the web. For this, you need a Serper API key. Serper offers free credits, making it useful for testing and learning.
A basic .env setup may include:
OPENAI_API_KEY=your_api_key
SERPER_API_KEY=your_serper_key
These keys allow the agent to access the language model and perform web searches.
Editing Agents and Tasks
One of the most useful parts of CrewAI is that you can define agents in a simple YAML format.
An agent usually has a role, a goal, and a backstory. The role is like the agent’s job title. The goal explains what the agent is trying to accomplish. The backstory gives the agent context and personality, helping it behave more consistently.
For example, a researcher agent might be described as a senior researcher focused on finding the latest developments in open-source AI agent frameworks.
The reporting analyst agent has a different purpose. Its job is to take the research results and organize them into a clear, detailed report.
The tasks file works in a similar way. Each task describes what needs to be done and what the final output should look like. This is important because agents perform better when the expected output is specific.
For the reporting task, the expected output is a fully formatted report in Markdown. This helps the final result look organized and ready to read.
Adding a Search Tool to the Researcher Agent
In the tutorial, the researcher agent needs access to a web search tool. Without this tool, it would not be able to search the internet for updated information.
To add the tool, you import it inside crew.py:
from crewai_tools import SerperDevTool
Then, the tool is assigned to the researcher agent. This way, only the researcher uses the search tool. The reporting analyst does not need it, because its role is to organize the information that the researcher already found.
This separation is important. It prevents both agents from doing the same job and keeps the workflow cleaner.
Running the Crew
Before running the crew, make sure you are inside the correct project directory and that your API keys are already added.
First, install and lock the project dependencies:
crewai install
This creates a UV lock file and prepares the environment.
Then, run the crew:
crewai run
Once the command starts, CrewAI begins executing the workflow. You can see the agents being started, tools being called, search results being processed, and tasks being completed one after another.
The researcher agent searches for information based on the topic. Then, the reporting analyst receives that information and creates the final report.
In the tutorial, the final output is saved as a report.md file. This file contains the generated report with organized sections and detailed information based on the research task.
Adding Extra Packages
If your project needs an additional package, UV makes it simple. For example, if you needed the AWS SDK for Python, you could run:
uv add boto3
This adds the package to your project and updates the lock file. This is useful when your agents need to connect with external services, databases, cloud tools, or APIs.
Why CrewAI Is Useful
CrewAI is useful because it helps turn AI workflows into structured systems. Instead of relying on one prompt, you can create multiple specialized agents. Each agent has a role, each task has a clear purpose, and the workflow can produce a real output.
This makes CrewAI especially useful for research, content creation, automation, analysis, reporting, and multi-step AI workflows.
For example, you could create one agent to research competitors, another to summarize market trends, and another to write a final business report. You could also build a crew for customer support, technical documentation, financial analysis, or lead generation.
The main advantage is organization. CrewAI gives structure to AI automation.
Final Thoughts
This tutorial shows the basic path to creating your first CrewAI project. You install Python and UV, install CrewAI, generate a project structure, configure agents and tasks, add API keys, connect a search tool, and run the crew.
By the end, you have a working AI crew that can research a topic and generate a report automatically.
The most important lesson is that CrewAI is not just about creating one AI agent. It is about creating a small team of agents that can work together. Each agent has a specific role, and each task moves the workflow closer to a useful final result.
Once you understand this basic structure, you can customize the agents, change the topic, add tools, connect APIs, and build more advanced AI systems for real-world use.


Comentarios0
Inicia sesión para comentar.